Posts tagged Design Process
How to streamline your process to impress your clients
clients-communications-workflow.jpg

Behind any design project, there are a few essential steps that set the basis for a successful - or disastrous - project or client relationship. Many of these steps are project documentation and administrative tasks, which are usually overlooked when you start working with your first clients. However, they can significantly impact on your work, your professional image and your business continuity and success.

Many freelancers and small business owners learn these lessons the hard way, and I include myself here.

Nobody taught me how I had to manage an entire client relationship when I first started this business. So I had to make a few mistakes along the way to learn how to do it properly.

Almost three years after starting my business I now have a clear communication process in place which saves me time and headaches along the project development and leverages my client’s experience.

Today I’m taking you through my entire client communication workflow to show you how to streamline your business to deliver a great client experience. This process can be useful to any service-based business.

So let’s start from the beginning…

With every new project I always have 3 objectives to accomplish:

  1. Creating an outstanding product to impress my client as well as other potential clients.
  2. Making the project as enjoyable as possible for both, the client and myself.
  3. Getting more business from the client in future, as well as new referrals.

With these 3 goals in mind, I have crafted a comprehensive communication process that starts with the client’s first email and ends with a very happy client and even happier designer!


1.    The first email

Getting an email from someone who is interested in working with you is very exciting. This email can be the beginning of a new amazing project. But the reality is that not everyone who contacts you becomes a client.

Many people are just shopping around. They have an idea in mind, and want to get a better understanding of possible costs and timeframes, but are not ready to get their project started just yet. In some cases, that idea will never go ahead.

Although getting a lot of expressions of interest is great, you want to minimise the time spent in answering emails and questions from people who ultimately won’t become a client.

The answers to those questions frequently asked in these first emails should be on your website. This way a potential client can find all the relevant information in your site before contacting you, and you can minimise the time spent answering those questions by email.

If you get a lot of emails that don’t convert into projects, make sure you have two important pieces of information on your website:

  • FAQs page (see mine here)
  • Pricing page (see mine here)

Yes, I know every client is different and the total cost of a project can vary a lot from one client to another. And I’m aware of how much information you need to collect first to properly quote a design. But you can give your potential client an idea of the project cost simply by packaging your services.

Put together the most common things that a standard project involves. Make 2 or 3 examples of standard projects, a.k.a. packages. Set a fixed price for each package and publish your packages and prices on your website. You will significantly reduce the amount of time spent replying emails.


2.    Welcome pack

When you get the first email from a potential client there are 2 important things that you can do next:

  • Collect more information about the project, to make sure you understand every possible requirement that can impact in the project cost. To do that, send the client a design brief questionnaire.
  • Offer more information about your process, your fee structure and payment conditions, etc. To do this, I have created a PDF brochure with all the relevant information for potential clients.

Take this opportunity to schedule an obligation free consultation with your potential client, face-to-face or via Skype, if the client is not local.


3.    First consultation

Every long-lasting relationship starts with a first date to decide whether you and the other person are a good fit.

Sometimes the project may be too big or too complex for you. Others may require someone with very specific technical skills that you don’t have. So this first meeting is key to understand what the project involves and whether you will be able to help your client.

If you aren’t the right person for the job, you can still offer assistance to source the right professional/s and liaise with them to facilitate the process for your client.

During this first consultation your client and yourself can:

  • Discuss the project brief and fill in the blanks to ensure you understand all the requirements.
  • Clarify what information the client needs to provide beforehand.
  • Explain what’s included and what’s not in your service to manage client’s expectations.

After the meeting you can send a quick email to thank them for his or her time and outline next steps to get the ball rolling.


4.    Secure the project

After your initial consultation, the client has agreed to start the project. But a design project can take weeks, sometimes months, to complete and a lot of things can happen along the way, including your client changing his or her mind about working with you.

For that reason NEVER start a project without formally securing the deal through a design contract and a non-refundable booking deposit.

Signing a design contract

This document ensures a fair business relationship for both parties. Some of the benefits of having a design contract in place are:

  • You will look more professional and have your clients taking you more seriously
  • You ensure the client reads and understands the terms and limitations of your service
  • It protects you in the case of project cancellation, payment issues, and copyright and intellectual property issues.

Paying a booking deposit

This upfront payment is the best way to ensure that you get paid even if the client changes his or her mind about the project, finds someone else to work with or simply gets stuck on their own projects and forgets about yours.


5.    Manage your project communications

During the design and development phase there are two essential documents that will ensure you and your client are always on the same page:

The Design Proposal

The most common questions that a client always has about their project are: “How much is it going to cost?” “What will I get for that price?” and “How long will it take?“. The best way to give a concise answer those questions is through a design proposal.

This document also helps you double-check and triple-check the project goals and specs with your client before getting hands with the design.

A design proposal contains a lot of information about the project and has to be customised for every client, so you would typically have a proposal template that can speed up the writing process.


Project Plan

The best way to work collaborative with your clients and other virtual teams on the same project is by using a live project management tool.

I personally love Freedcamp to manage multiple projects at the same time and work virtually with my clients and collaborators. The benefits of using a project management tool are:

  • You can get the project documentation organised in the same place
  • You will be less dependant on email by taking project conversations and discussions in this system
  • The client can follow-up the progress of their project reducing the number of “how is my project going?” emails.


6.    Thank You Pack

The Thank You pack marks the closure of the project. It’s a sweet way to clearly estate the project is over and every extra task that needs to be done from now on will be billed separately. But it’s also your last chance to make your client fall in love with you.

Don’t just say good-bye, take this opportunity to strength to your existing relationship with your client and leave the door open to work together in future projects, as well as get new referred work from them.

Some things you can include in your thank you pack - or good-bye pack - are:

  1. Thank you note and a gift – make the client feel special by thanking them for their business and giving them a small gift.
  2. Email subscription - stay in touch by adding their emails to your newsletter list.
  3. Free premium content - Give them free access to paid content and private Facebook groups.
  4. Referral discounts - Reward them for any new referral with discounts in future designer jobs.

Take action

Download my Client Communication Checklist to streamline your workflow and deliver a great client experience.

If you want to see some real examples of these documents mentioned above, learn how to write effective proposals or working with project plans, and download templates to create your own client communication workflow join my 6 weeks Creative Business e-course! You will find all of this information there and much more! Coming soon in March.

If this sounds interesting, sign up with your email address to receive updates and sneak peeks of this course.

Do's and dont's before getting a new website

So you want to design a new website for your business. You have images, content and are all ready to get started. You want your website up and running in a few weeks. However, after meeting with your designer you realise it’s not going to happen so quickly.

Not just that, you also realise that some of the decisions you made on your own for your website weren’t quite right, which ends up wasting time and money.

To get a website design project right from the beginning it is important to know what you should do and what you shouldn’t, or at least not without consulting your web designer first.

Do focus on the main purpose of the site

The main purpose of any business website is growing the business, but the question is HOW. Do you want to improve your brand awareness? Or grow your sales? Do you want to give your existing customers better service?

By having a clear description of the main purpose of your website you will help your designer understand where the focus should be and make confident decisions along the design process.

Do sign a design contract

A design contract is the best way to ensure everyone understands and agrees with the terms of service. The contract should include basic terms and conditions on events such as contract termination, copyrights, licensing, payment conditions and service limitations.

I use the design contract provided by AIGA (The Professional Association For Design).

Do get an estimate in writing

Although a website project is very difficult to quote in its early stages, always ask for an estimate before paying any deposit to avoid unpleasant surprises.

Ensure you understand the billing method – hourly rate or fixed price –, what’s included in the price and what’s extra.

In this other post, I explain how I price my design services to make it as fair as possible for both, the client and myself.

Don’t buy hosting

Discuss the hosting options with your designer first. Some solutions cannot be hosted by anyone, like SquareSpace. Also in many cases, web designers and developers work with multi-hosting services and could host your website for free.

Do always choose open-source tools

Always request an open-source content management system (CMS) – like WordPress, Magneto, Shopify or Squarespace - so that any designer or developer can access it in the future.

Some design companies work with proprietary CMS. If that’s your case, you'll get stuck with the same company – and their fees - forever.

Don’t rely on the design brief only

One of the hardest things of a brief questionnaire is asking the appropriate questions in a way that the client can easily understand. For example, when a client says “I need a Wordpress website” quite often what they mean is “I need a Content Management System”, but Wordpress might not be the right solution for them.

After receiving the client brief, I always arrange a face-to-face meeting with them – or a virtual meeting if the client is not local – to fill the blanks and clarify the project requirements.

Do research your competition

To figure out what your website needs in terms of content, functionalities, etc, check out your competitors websites and make a list of all the features that you would like to incorporate into your site. This list will be really helpful to your designer later.

Do invest in beautiful photographs

The Internet is getting more and more aesthetic every day. Professional photographs beautifully styled can immediately build trust in your business, and create a quick emotional connection with your visitors.

Do not use photos taken by yourself in your website. A good image needs proper lighting, a good styling and quite often a lot of Photoshop editing and retouching too.

You can see an example of Photoshop retouching for one of the website I designed last year here in my portfolio.

Do involve your designer in the photography shooting

Not every image is suitable for a website. Your website photographs must have a consistent look and feel, an appropriate lighting and a specific format. A lot of white space in the background is also highly desired to add text to it.

Your designer can brief your photographer on what sort of images your website may need.

Do get your copywriting ready

Any website is designed around its content. To avoid delays during the design process, you can start working on your content beforehand, and have it ready in advance of the website design being started.

At this stage, you may want to engage a copywriter to help you compose a compelling message for your website.

Do carefully think about your page structure

Provide a logical order to your website content to make it easy for visitors to navigate. Organise your content in pages and connect pages through relevant links and call-to-actions (CTA).

Start by putting together a simple site map; fill every page with sections, and every section with subsections.

For some tips on How To Write The Perfect CTA visit this other post previously published here in my blog.

Don’t make the users think, wait or read

Having too much content will make your visitors feel overwhelmed and want to leave your site quicker.

Break your content into the smallest possible units to make it very easy to read. Add titles and subtitles and establish message hierarchies. Use icons, bullet points and numbered lists to make your content easy to scan.

Do think of ways to engage your audience

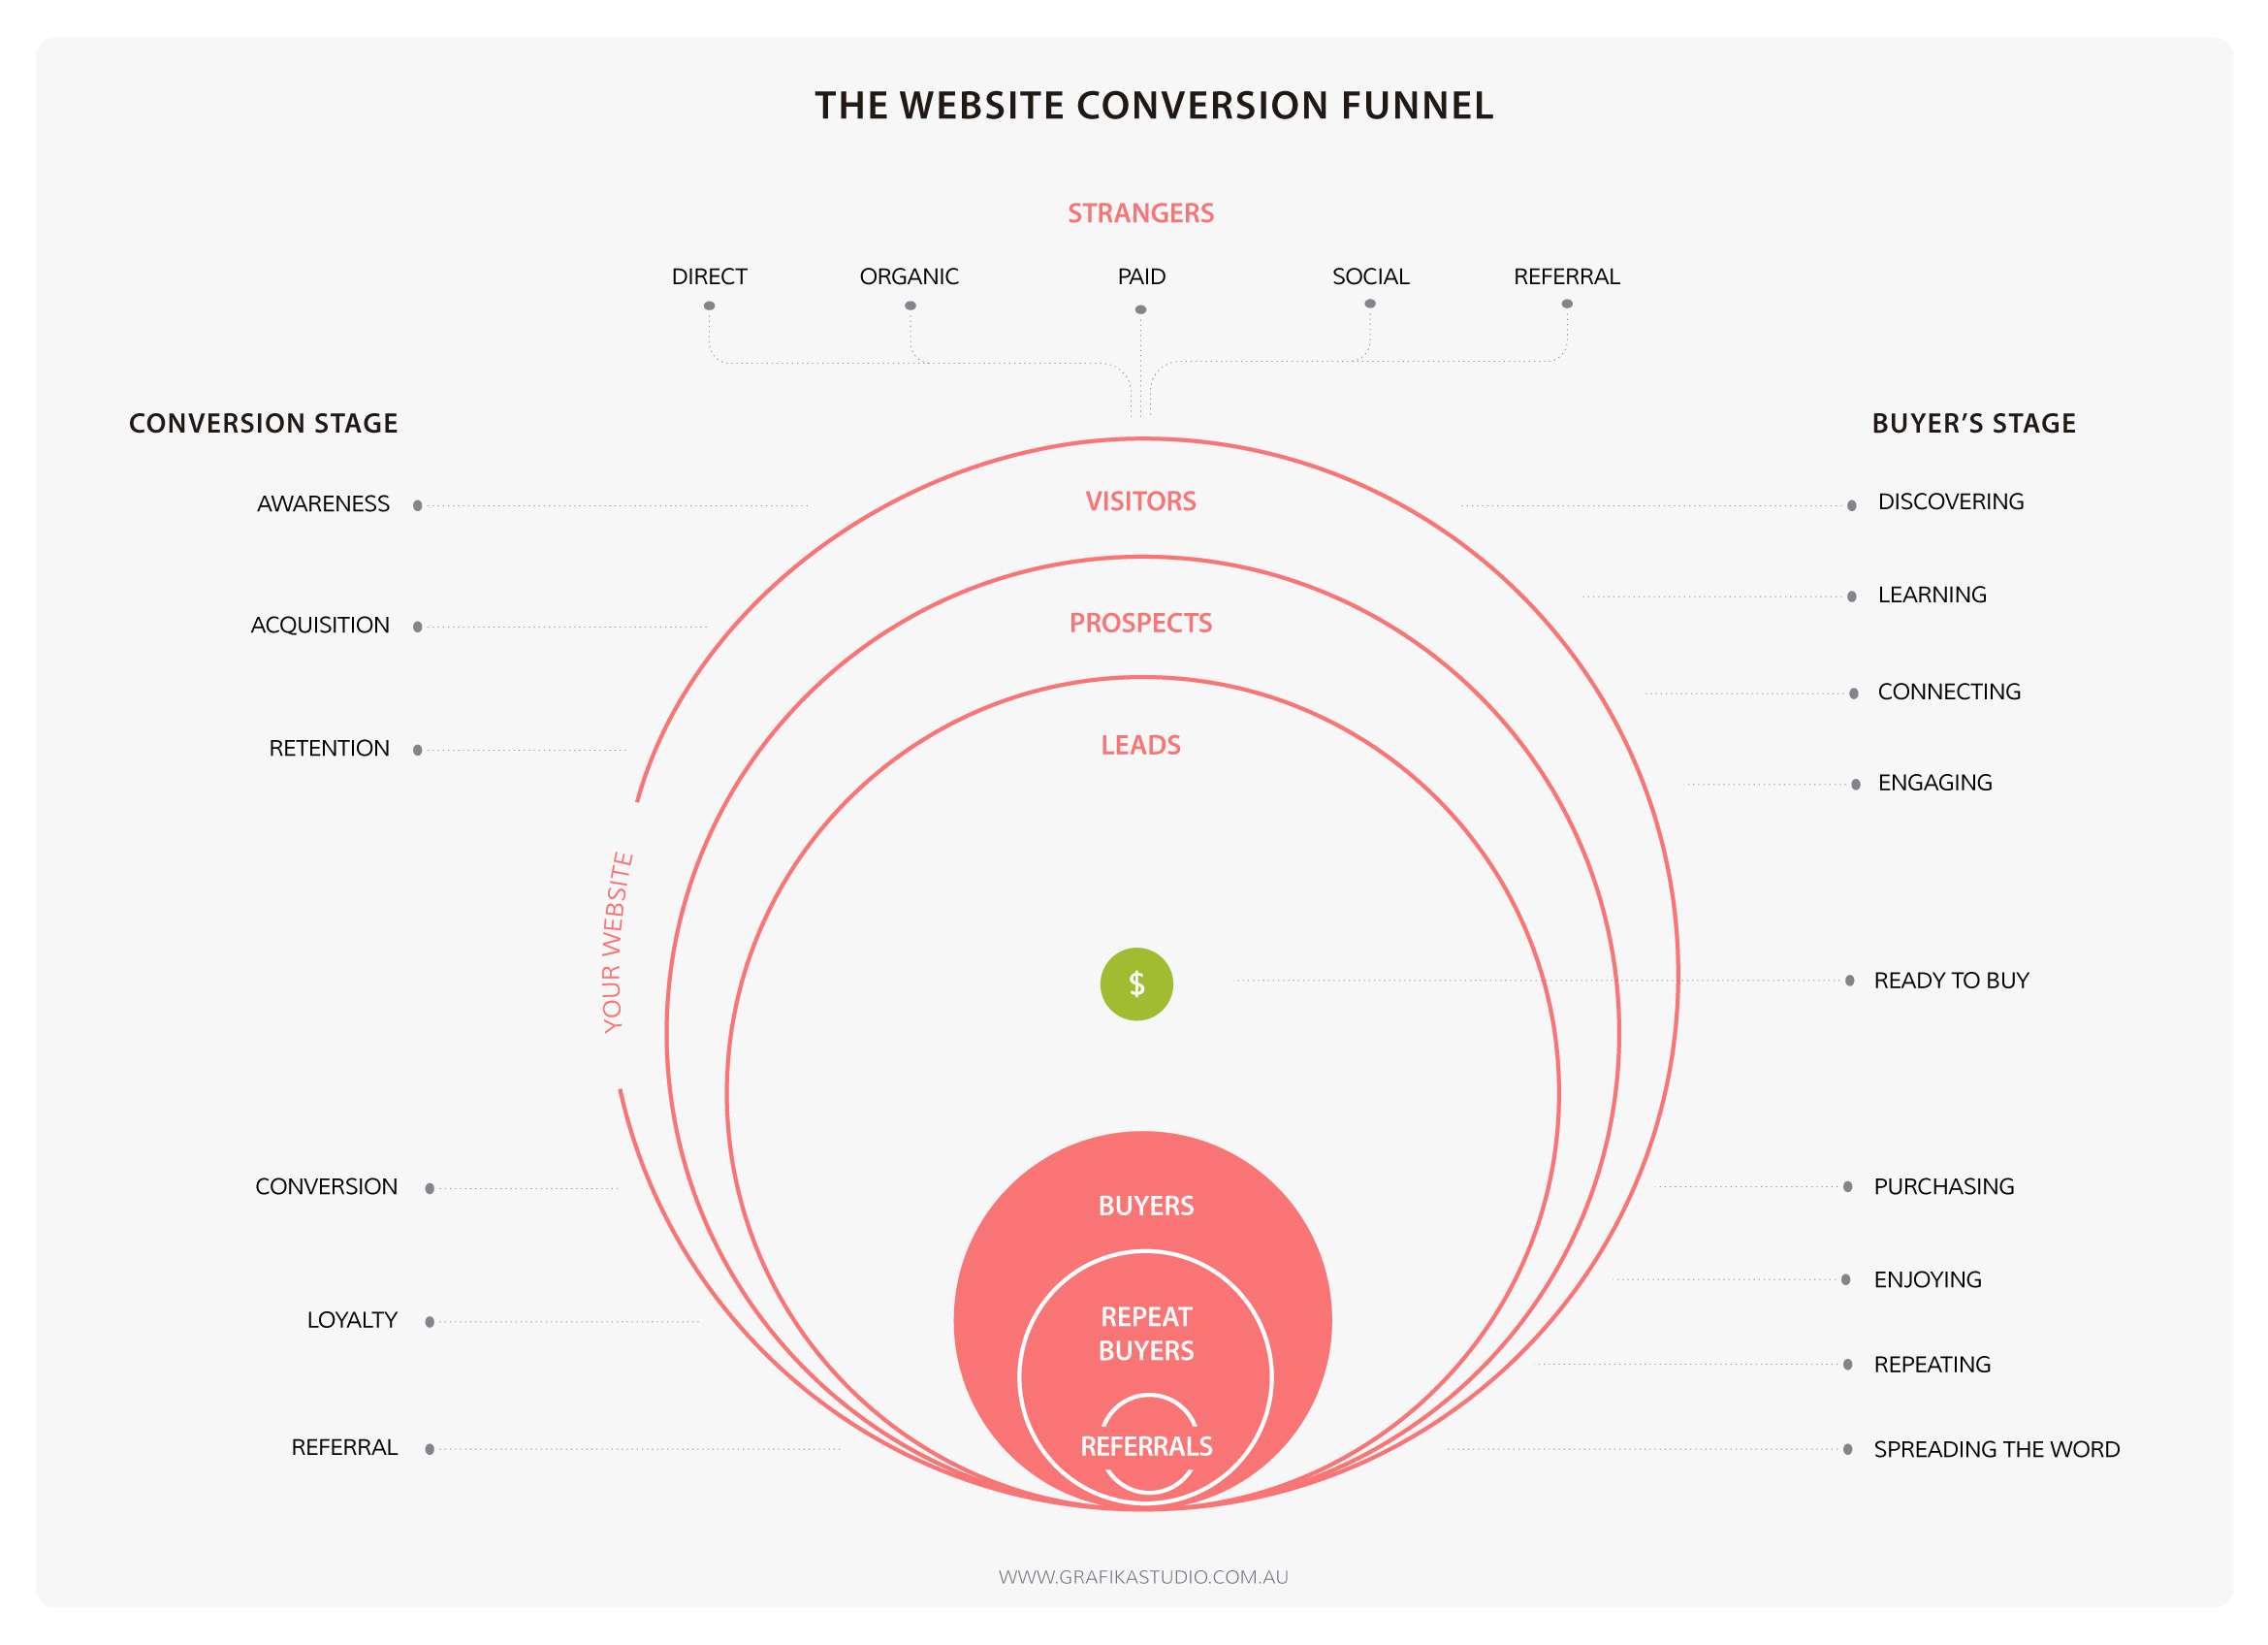
When someone visits your website she/he won’t be immediately ready to buy from you or hire your services. The conversion process is slow and takes time and a lot of interaction with the visitor to build trust before they are ready to make the purchase decision.

These interactions can be done through sign-up forms, downloads, blog comments, social media following and sharing tools, etc. They are supported by external platforms and tools that need to be set-up beforehand and are usually introduce by effective CTAs.

Discuss any possible interactive feature with your designer before getting the design process started.

Don’t assume your website needs everything

Not every website needs a blog, an email subscription box, or links to social media pages. Any of these features will involve a lot of time putting quality content together for your readers.

Having an abandoned blog or social media page will give your visitors the impression of carelessness, and they will lose trust in your business.

Don’t expect success overnight

The single fact of having a website online doesn’t mean that you’ll start getting visitors straight away, neither will you get customers or clients inmediately. Your website is just the beginning of the journey.

Be prepared to invest time and money in digital marketing to drive traffic to your website and increase the sale conversions.

Don’t try to do it yourself

I always believe in doing what I do best and leave everything else for those who are experts in everything else.

Behind any website design process, there are many things to take into consideration to create an effective business website.

Even if you feel confident building your own website, you may want to get some help and guidance from your designer through some mentoring sessions or design consultations.


Wrap-up

Good design takes time, and building a professional website can take a few months of work. If you are looking to build a professional website to grow your business, engage a website designer asap. Your designer will help you prepare the material, setting your website right front the beginning and ensuring you get the best return on investment for your business.


How To Save Money In Design Services
Photo: Finance Planner by Grafika Studio

Photo: Finance Planner by Grafika Studio


Design services are something that every business needs, but they’re not always a priority in tight small business budgets. When the budget is very limited knowing where you can save money without compromising quality can make a huge difference in the final result of your design project.

In today’s post, I share some tips to maximize your design budget, whether you want to build a website by yourself or hiring a professional designer to do the job.


Plan your design project carefully

The first step of any design project is a good planning.

Having a project plan will give you a clear understanding of how much everything can cost and how much time each part of the project will take.

For example... if you need to build a website, you can:

  • Make a list of every task/item that your project requires: domain, hosting, email services, website builders, design software, etc.
  • Research solutions and prices for each of them.
  •  Write down what is included in the price, as different provides offer different things in their packages.
  • Compare prices and read reviews.

Then, you can take your project plan to a designer and discuss your budget. Your designer may be able to adjust the budget by taking off unnecessary things or adding others that you may have overlooked. A designer can also give you an estimate on time and cost to complete your design project so that you can compare.

This exercise will help you decide whether you want to do everything by yourself or it’s worthy to hire a designer.


Use web templates

If you are building the website yourself, web templates will make your life much easier. If you are hiring a web designer, a template will also make your total website cost more affordable.

Bespoke web design is a lot more expensive than building a website from a pre-made template. Web templates speed up the process of building a website allowing the designer to complete your project quicker. In the business world time is money so, the less hours the designer has to dedicate to build your website the more money you save.

The hard thing is to find the right template to suit your needs. Finding a template requires a lot of research and a good understanding of all different web components included. Wordpress catalogue is so large that finding what you are looking for can take you a long time. Squarespace gives less choices but this can actually save you time finding a template for your website.

Some web templates can be edited to suit your specific needs, but then again customisation comes at a cost. You will need to hire a web developer to edit your template, adding an extra cost on your website budget.


Buy ready-to-use graphic components

Like templates, ready-to-use components not only can help you build your website quicker but can also save you money as your designer doesn’t have to create every graphic element from scratch.

For example…

If your website needs photographs, it’s a lot cheaper to buy stock images than hiring a photographer to take photos. In the same way, it’s cheaper to buy a ready-made icon set than designing one specifically for your website.

Some great places to find ready-to-use design assets are:

  • creativemarket.com
  • envato.com
  • graphicburger.com


Choose flexible and scalable solutions

If you are building your first website, you may want to do it in two or three different stages. By dividing your project in stages you can launch a basic website and then add new features and functionalities as your business grows.

For example…

If you want to sell products online, you can start selling through third party websites and have a basic website for your business. Then, if your products sell online, in a few months time you may want to add a shop and sell your products directly from your own website, saving money in third party commissions.

To upgrade your existing website, you probably don't need a complete new site. Your current website could be redesigned or extended with new features. However, depending on the website, the platform in which is being built and the number of changes required, it might be cheaper to build an entire new website that re-designing and upgrading your existing one.

For example…

If you have a shop in your Squarespace website and want to add a wish-list feature, unfortunately Squarespace doesn’t have this functionality just yet. For that reason, your entire website would have to be migrated to Wordpress to be able incorporate that feature.

This is also why good planning is important, if the wish-list was in your add-on feature list for future stages, Squarespace wouldn't have been the chosen solution in first place.


Negotiate design packages

Many designers offer their services in packages at a discount rate. By working with the same designer in different design projects you can get packages and discounts that can also save you some money.

For example…

If you are looking to have a new brand and website designed, ask your designer if there is any specific package that combines both projects.


Hire a design consultant

If you feel confident enough to build your own website, you might want to consider hiring a designer as a ‘consultant’ to can give you some guidance along the way. As your designer doesn’t have to build your website from scratch you can save some money by doing it yourself. But your designer can still help you with:

  • Reviewing your budget to make sure that you haven’t overlooked any important cost and advising on areas where you should spend a bit more and others where you could save some dollars.
  • Giving you access to discounts and special rates from providers. Designers usually go shopping around comparing solutions and prices from different providers, negotiate prices and get discounts for bringing repeating business.
  • Training you on the relevant website builders and giving you a hand if you get stuck while building your own website.
  • Identifying and avoiding mistakes that can incur unnecessary costs. For example, you may find a fantastic hosting offer and grab it. Then you find out this offer has hidden fees and end up paying more with that provider than with others.


Wrap-Up

In summary, a good designer is someone who understands people’s budget constraints and maximize the money available according to the client’s business objectives. If your budget is tight, your designer can research and find the best solution for your design project to suit your budget.

Here is a checklist of important questions to ask your designer before starting a website project, as they will have a critical impact on your design budget.

  1. Do you offer a free first consultation to discuss my project requirements?
  2. How much does the annual hosting and domain registration of my website cost?
  3. Do you custom design or use templates?
  4. Do you charge by the hour or by the project?
  5. Can my project be split in two or more stages?
  6. Can additional add-ons and optional functions be quoted separately?
  7. How much does it cost to update my website post sign off?
  8. Do you offer a monthly maintenance option?
  9. Do you offer free CMS training?
  10. Do you offer design packages?
  11. Do you offer consulting services? (in case you want to build the website yourself)
  12. What are the ongoing charges after my website is completed?

Your turn

  • How much do you think is reasonable for a small business to spend in building a website?
  • Would you build a website yourself to save your business that cost or are design services a necessary investment?


Designing An Effective Logo

A logo always seems like an easy thing to do for any designer. However, although a good logo may be simple in its construction, it’s not in it's concept. Behind every professional logo there are many hours of research, sketching and testing. Understanding the process behind a logo design can help small business owners to know:

  • what makes a good logo and what doesn’t
  • what to expect from your designer when they design a logo for your business

I’ve been recently working on a logo design for a new business in Perth, WA Mortgage Advice (website coming soon) and I thought this work could be a perfect opportunity to take you through my logo design process.

My logo design process has five stages:

1.    Discovery

The first step of any design work is getting as much information as possible about the client’s business. This information can be obtained through a conversation with the client, through a design brief questionnaire and by researching their market.

By way of example, my latest client is a mortgage broking business, a completely unfamiliar professional field for me. Learning as much as possible about my client’s business was my first mission. To do this I first held a one-to-one meeting with my client.

During the meeting I gave my client a list of descriptive words to select the three that best describe the business personality and core values. My client used words like trust, knowledge and honesty that would give me some clues of what design elements I should consider to visually describe this business.

I get the information I need from a few carefully crafted questions in my design brief questionnaire. This questionnaire helps structure my meetings and formalise the information gathered in a document. When I cannot meet the client face-to-face, I send the questionnaire by email. I could skip the meeting if necessary, but I cannot skip the design brief questionnaire.

A good brief cannot just rely on the information obtained from the client; you also need to research their market. This is always a good chance for me to do visual research, reviewing logo designs of my client’s competitors and seeing how their brands look.  
 

2.    Sketching

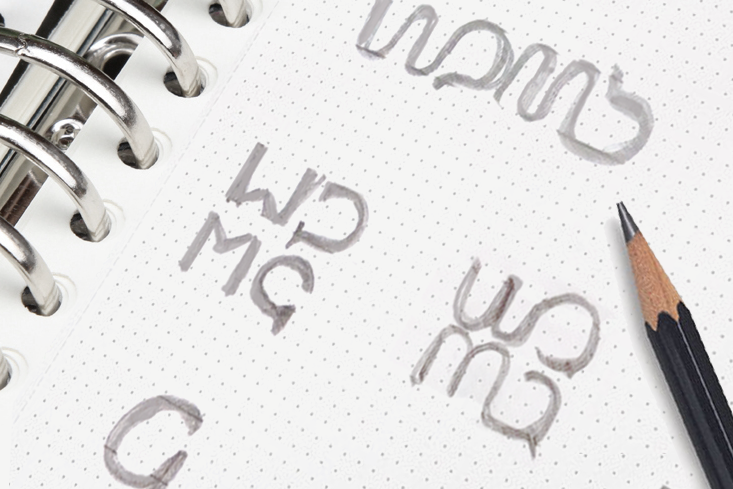
During this phase I sketch dozens and dozens of logos. I start conceptualising the business in a few simple ideas, then I play with the business name or the acronyms, and mix ideas and concepts with letters and shapes.

logo-sketching

When someone talks about “mortgage broking” you immediately think of homes, banks, and approval processes. But my client highlighted ideas like offering guidance and giving clarity, security and confidence to people to make lifetime decisions. Listening and understanding clients to give this advice was one of the core values of this business, what gave me the idea of using speech bubbles in one of my logo designs.


3.    Designing

After a few hours sketching concepts, I eventually picked the three best concepts that I came up with and drew them in Illustrator. Why only three concepts after sketching dozens of them? Because something I learned about clients is that the more ideas you present the more difficult is for them to make decisions.

At this stage I don’t add colours or anything else just yet. I present the logos to the client in black and white to focus on the concept rather than on the style.

Here are the three concepts presented to this particular client:


4.    Polishing

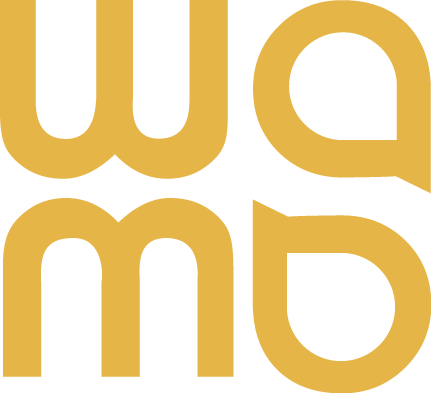
This is my favourite part: the client picked the concept, so now I could go back to Illustrator and refine my logo design. I measured every distance; made every size proportional and every angle identical.

wa-mortgage-advice-logo.jpg


5.    Development

Now that the logo is finalised I can complete the entire visual identity with colours, fonts, logo variations, etc. To do these final selections I can go back to my design brief and use the descriptors that the client gave me.

wa-mortgage-advice-logo-variations.png


For WA Mortgage Advice I picked a light orange as the primary colour. The client highlighted the importance to communicate a very genuine intention of helping people in the best professional way. According to studies on the emotional meaning of colours, orange is the most suitable colour to communicate friendliness and client care. Orange also would give the brand a modern, young and energetic edge.


wa-mortgage-advice-logo.jpg
 

During the development phase it's important to test the logo in different media. To do this I create a few mock-ups of business stationary, advertising or other marketing materials that the client may produce in the future. This way I can see how the logo will look and whether it's necessary to make any final changes.

wa-mortgage-advice-business-cards.jpg

The objective of my design process is to ensure my logos always meet the five principles of any logo design: simplicity, memorability, versatility, timelessness and appropriation.

Now, that you know the different steps involve in a professional logo design and what makes an effective logo, you can put your own logo under test.


Is your logo right for your business?

1. Is your logo simple?

Good logos are uncomplicated. The more detail a logo has, the more information the viewer has to process and retain. Simplicity will make a logo easy to recognise and to remember.

As explained in stage 3 (Sketching) I design my logos just with a pencil first, in black and white, to ensure effectiveness in its simplest form. Colour should be left to the end of the design process.

2. Is your logo memorable?

A good logo is easy to describe. What's difficult to describe, is also difficult to remember. Recognition brings familiarity, which assists in building trust and loyalty in your brand.

3. Is your logo versatile?

As I mentioned in stage 5 (Development) a well-design logo will translate well across different mediums. When printed in small sizes, a complex design will lose detail, making it harder to recognise. A good logo must be simple in order to reproduce well on small scales, such as favicons.

For this reason, logos should be always designed in vector format, that is Adobe Illustrator, never Photoshop.

4. Is your logo timeless?

An effective logo should endure the test of time. A good logo designer doesn’t follow any design trend. Trends come and go and ultimately turn into cliches.

5. Is your logo appropriate?

A good logo design will be relevant to your industry, clientele and target market. Even though your logo doesn’t have to describe what your company does, it has to reflect your business essence and values (as I illustrated in stage 3, Sketching).  


Sources: